


I got so much positive feedback on my Bunny Free app that I decided to make an Android version. Check it out! It’s free on Google Play.
https://play.google.com/store/apps/details?id=com.margaretlillian.bunnyfree


I got so much positive feedback on my Bunny Free app that I decided to make an Android version. Check it out! It’s free on Google Play.
https://play.google.com/store/apps/details?id=com.margaretlillian.bunnyfree
The iOS 6.0 issue has been resolved. If you have the app downloaded, you should see an update through the app store automatically. Thanks!
https://itunes.apple.com/us/app/bunny-free/id853346357?ls=1&mt=8
I’ve received a handful of emails about issues with the Bunny Free app on older iPhones. First of all, I’d like to extend a sincere THANK YOU to everyone who reached out to me! I really appreciate everyone that took the time to write to me in response to this problem. I was able to find and resolve the problem much faster thanks to your feedback.
I submitted a patch to the app today and I am waiting for Apple to push it out to the App Store now. It took about a week for the app to be approved initially, so I’m anticipating the same timeframe to publish new versions. I will post an update here when the new version is available. The app should work on all devices running iOS 6.0+ once the update is available.
Thanks again for the feedback and patience. As a side note, it’s been pretty cool hearing from users all over the world!
I am the worst kind of blogger. It has been months since my first and only post, and this update is of the worst variety: the shameless plug.
Shameless Plug #1: There is a developer community conference taking place in Detroit on May 30-31 called self.conference. Dozens of talented programmers will be talking about all things development. Check out Chelsey Baker’s session, “An Intro to Auto Layout.” There’s a lot to learn in Auto Layout and it can certainly get confusing, but it’s worth it. Chelsey is a professional iOS developer and an excellent teacher – her session will get you started on the right foot.
Shameless Plug #2: Speaking of iOS, a new app I’ve been working on is available on the app store as of this evening! It’s called Bunny Free and it helps you find companies that don’t test on animals. I’m planning to make an Android version of this next, and my goal is to write a few tutorials as I try to make the switch back to Java.
Recently I started picking up the basics of iOS development. It’s been years since I’ve explored mobile development, and everything has changed! The idea came about during my volunteer time in Cambodia. Unfortunately I had no idea I would be making an app, so I was stuck with my circa 2006 MacBook running Snow Leopard and Xcode 3 with iOS 4. This was enough to get an initial version of the app ready, but when I came back to my MacBook Pro I hit a lot of obstacles trying to figure out what’s what in Xcode 5.
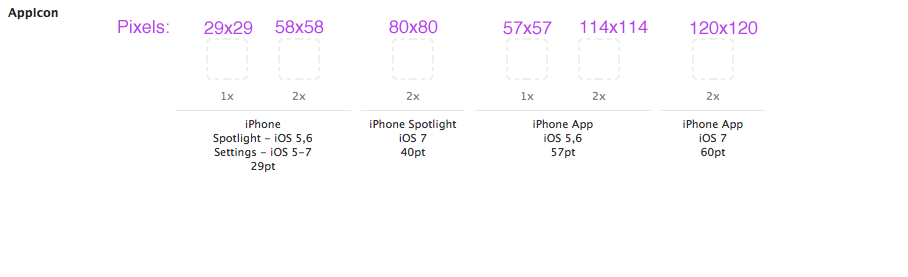
One thing in particular that confused me was the new way that Xcode handles icon sets. At the time of this writing, Apple has published required sizes for icons in the iOS Developer Library (note: you must be a member of the iOS Developer Program to view the link). The table looks like this:

Apple also notes: “If you need to support standard-resolution iPhone or iPod touch devices, divide by 2 the high-resolution sizes listed below.”
I started to have trouble when I tried to map the table above (with the divide-by-2 condition) to the following view in Xcode:
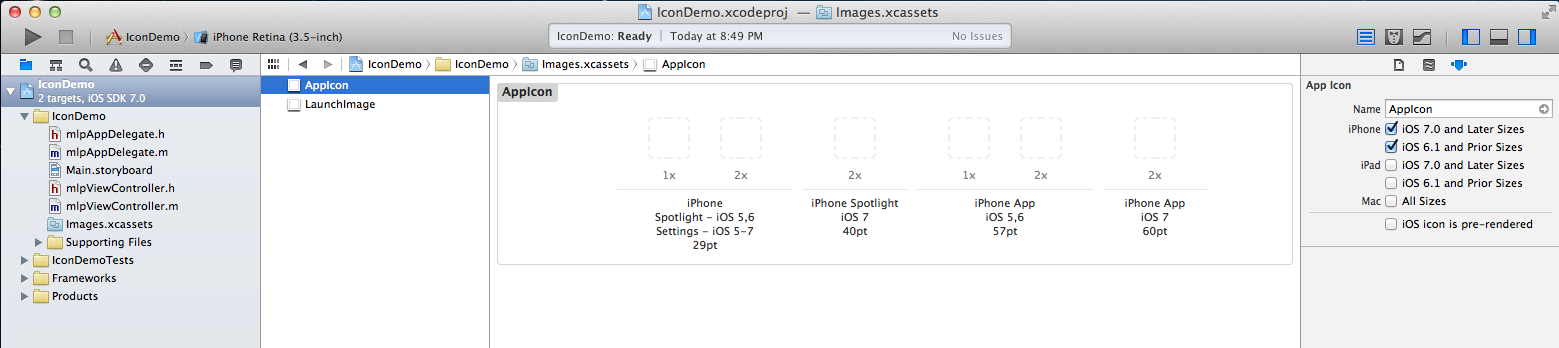
In this example, I have both “iOS 7 and Later Sizes” and “iOS 6.1 and Prior Sizes” checked in Attributes Inspector.
I got confused and wasn’t sure what sizes were needed in each slot to meet Apple’s standards. I should mention that if you don’t use the right sizes, your project will have errors and might not build. Xcode 5 is relatively new, and so I couldn’t find an example online. I decided to switch back to the old way of setting icons so I knew I would get it right and I could move on.
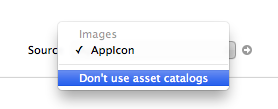
To do this, I clicked on my project, then clicked the “General” tab, and scrolled down to “App Icons”. The default is setting is using an Asset Catalog.
![]()
I switched this to “Don’t use asset catalog”:
At this point, all of the expected graphics and their required dimensions are displayed.

Now I could see what icons I needed, create and add them to my project, and then set the correct image for each icon by clicking the folder graphic on the right. I found it helpful to name each of my icon files according to their size so it was easy to match them up
![]()
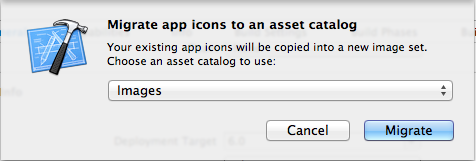
Once I had all the icons set, I wanted to convert it to an Asset Catalog so that I could understand how the new approach works. I clicked “Use Asset Catalog” next to Source, and then I selected an existing asset catalog (added by default in new projects) to migrate the images.
Now I had all my icons set using an asset catalog. Hooray!

More importantly, clicking on each image shows its dimension in Attributes Inspector. Clicking through each image helped me understand what this screen was asking for – now I get it! For example, in the first group the “1x” placeholder is expecting a 29px square image, so the “2x” placeholder is expecting a 58px square image. If you’d rather not do math and you just want a reference (like me when it’s late and I’m just trying to finish my app already!), this chart is for you:
I have been focused on iPhone only, but you could follow the pattern to figure out what is needed for iPad and Mac icons.
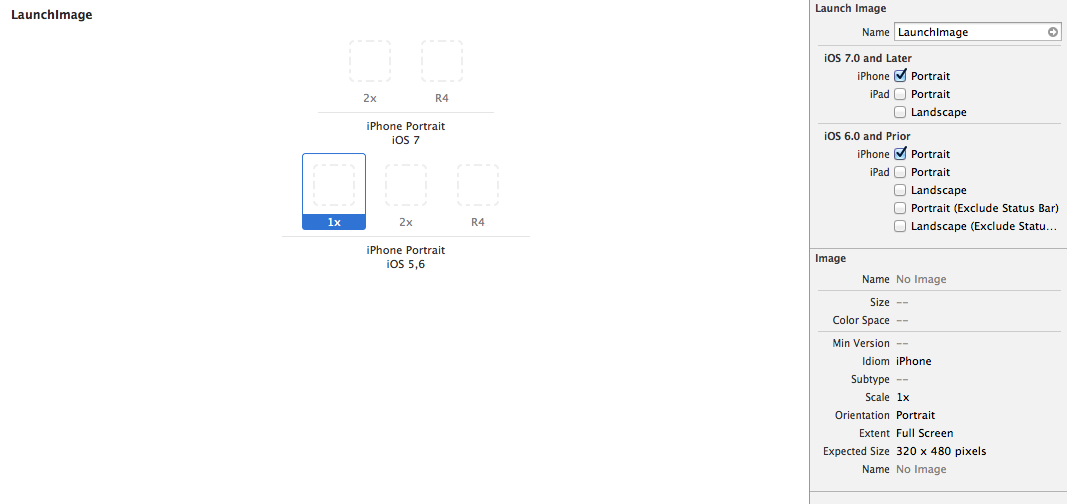
If you want to use asset catalogs for launch images, notice that Attributes Inspector tells you directly what size it expects for each placeholder (see the bottom right corner of this screenshot – “Expected Size” – this is not present for the app icon sets):
Hopefully this helps explain asset catalogs and how icons are handled in Xcode 5!